Customizing the Tabbing order on a Diagram
( new to Analytica 5.0 ) When you work with a diagram, pressing the TAB key selects the "next" selectable node, and pressing Shift+TAB selects the "previous" selectable node, relative to the current primary selected node. When nothing is selected, the "first" selectable node on the diagram becomes selected. Also, when you enter a value into an input node and press Enter, it moves to the "next" node.
This idea of which node come "next" creates a natural ordering in which your user will visit the nodes. By default, Analytica defines this ordering as being from left-to-right, top-to-bottom. In your own interfaces, you might occasionally want to change from this ordering to a different ordering, particularly when you have created a user interface and want the user to visit the inputs in a custom order.
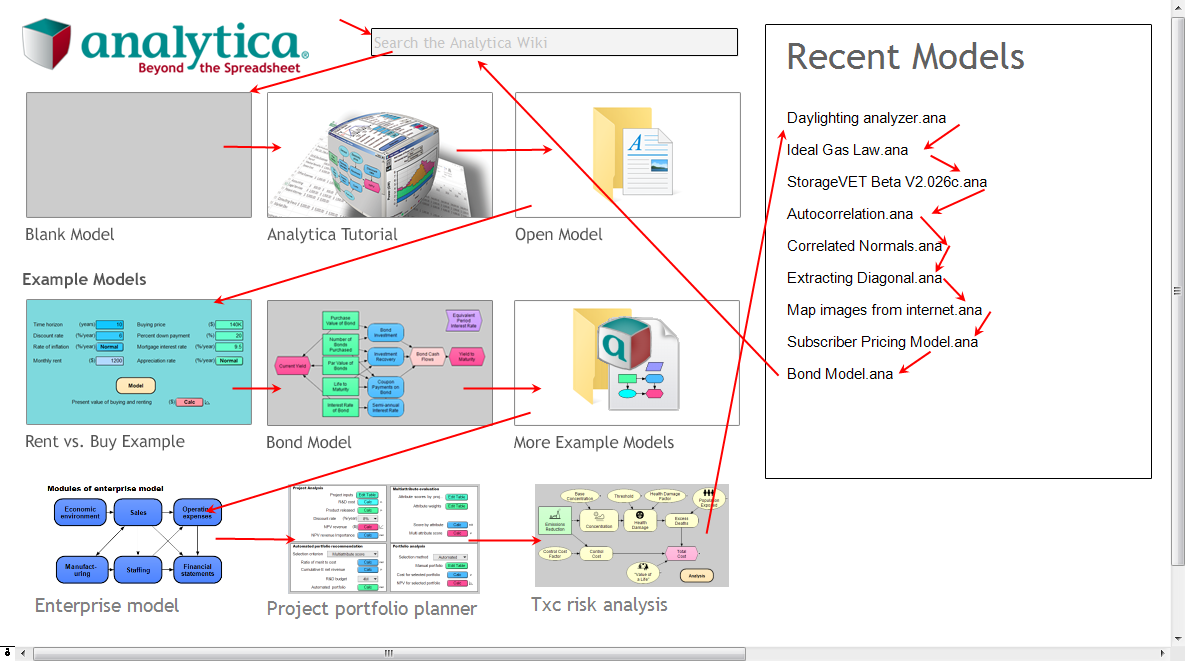
An example of this occurs on Analytica's intro screen. The actual customized tab ordering is as follows:
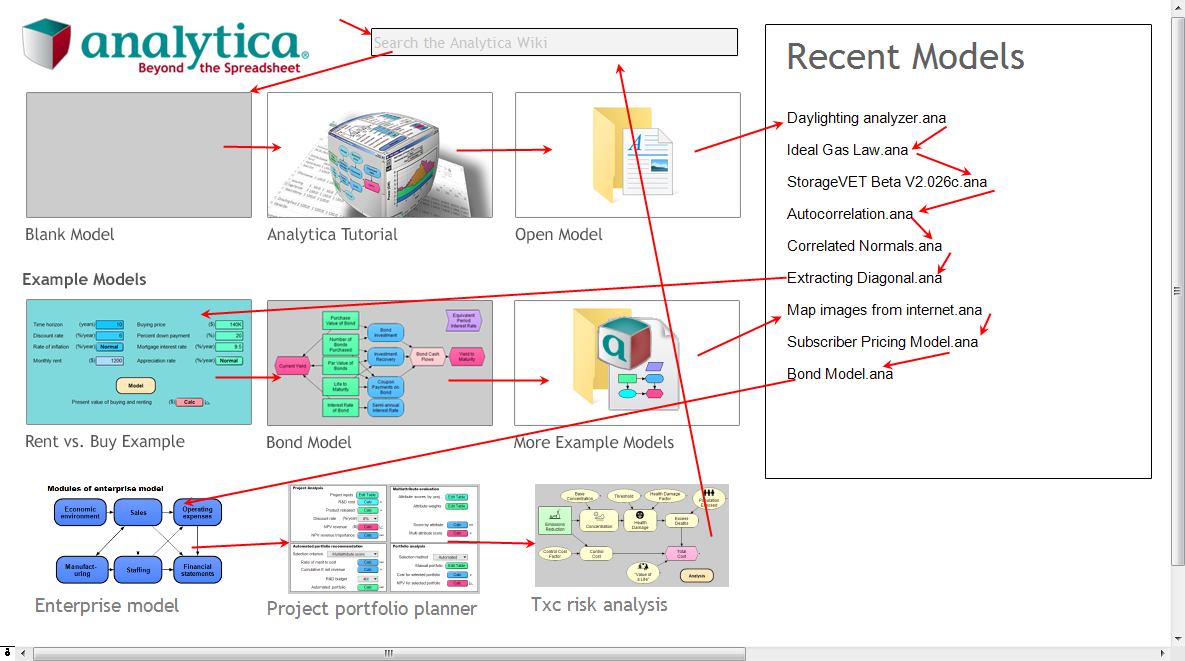
As you press the TAB key, you start at the "Search the Analytica Wiki" node, then move thought the options and models on the left, then linearly through the recent models, in an order that feels natural. If this screen had used the default tabbing order, in would be as follows, which feels unnatural as you jump back and forth between the options on the left and the recent models.
NextInTabOrder attribute
To customize the tabbing order, you set the NextInTabOrder attribute of a node to the identifier of the node that should come next. You will need to set this attribute from the Typescript Window -- it does not appear on the Attribute panel or Object Window. Press F12 to access the Typescript Window.
To specify that NodeB comes after NodeA, simply type the following typescript command:
NextInTabOrder NodeA : NodeB
NodeA and NodeB should both be in the same diagram, of course, or this doesn't make sense (this can't be used to jump to a totally different diagram!). The main thing you need to pay attention that you are using the identifiers of the actual user input and output nodes, and not the identifier of the original variable. For example, you might have a variable named X within your model, and then you have a user input node for X, the user input node will have its own identifier, usually a randomly generated identifier such as Fo1483485521. To find the identifier of user input or output nodes, type:
Aliases of X
where X is the actual variable.
Strictly speaking, you only need to specify the NextInTabOrder attribute for those nodes for which the default ordering goes somewhere different than where you want.
The previous node
The "previous" node, which the user jumps to when he presses Shift+TAB. is determined automatically by inverting the NextInTabOrder map.
The first node
When no node is selected when the user presses the TAB key, by default the topmost, leftmost node becomes selected. To customize this, create a tiny text node with no title or description, and position it in the top-left corner of your diagram. Because of its placement, this will be the first object in the tab order, but in browse-mode a text node is not a selectable object, so its next node will be selected. You can change the identifier of this text node in its object window, if you want, and then configure its next node, e.g.,
NextItTabOrder te_StartOfTabbing : Fo8212345321
where te_StartOfTabbing is the identifier of this text node. This node will get selected in edit mode unless you also do the following:
ChangeNodeVisibility( Handle( te_StartOfTabbing ), 'Very hidden' )


Enable comment auto-refresher