COM Integration/Writing your own COM component using VC++
Requires Analytica 4.6 Enterprise or better', and Microsoft Visual Studio
Introduction
This article leads you through the steps to create your own COM component in VC++ that can be called from your Analytica model. This provides a mechanism to call your own C++ code from Analytica. You may want to do this when you have an algorithm that you want to make really fast, have pre-existing and complex C++ code that you want to call, or want to create a wrapper to integrate with some other existing component, service or program.
The instructions here use Visual Studio 2013 Update 5. The steps may vary slightly in different Visual Studio releases.
In this introduction, I create a component named Rainfall.Counter. Your own component name will differ, so make the substitution with your own component name where appropriate. Once completed, the component is used from Analytica by first instantiating the object in an Analytica variable using.
COMCreateObject("Rainfall.Counter")
And then calling its methods from other within the Definition of other variables. The methods of this class accept a one-dimensional array as input and return a one-dimensional array as a result.
Create the Project
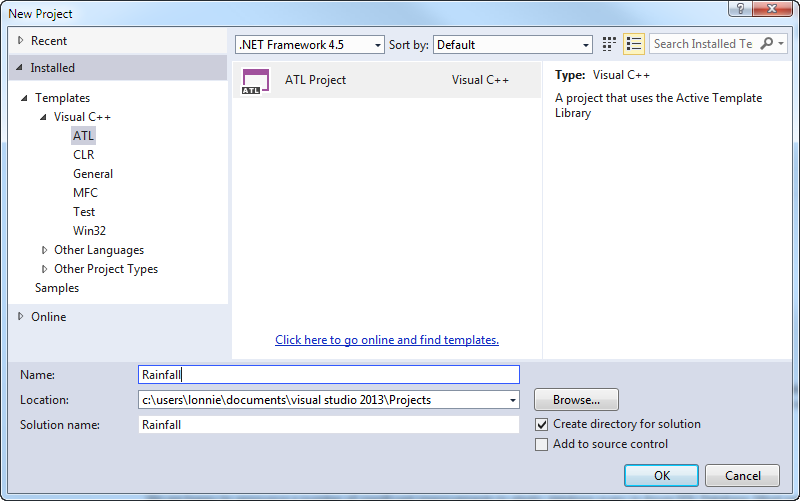
Start by creating a Visual Studio project. Launch VS and select File / New / Project… / Templates / Visual C++ / ATL / ATL Project.
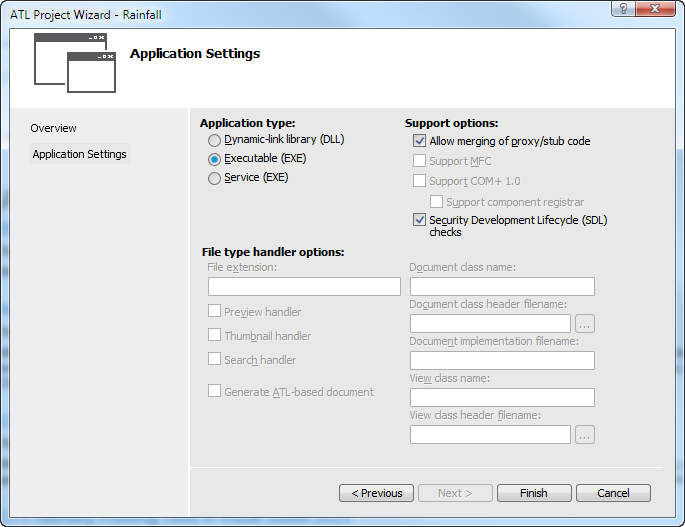
Enter a name for your project -- my project is named Rainfall. Press OK. On the next screen, set the application type to Executable (EXE) and check Allow merging of proxy/stub code.
The proxy/stub is for convenience, eliminating an extra DLL that would otherwise have to be distributed with your final solution. The other Application types can also be used, but if you aren't sure why you'd want them, stick with EXE.
Once you press Finish, your initial project is created.
Configuring to be 64-bit
You may optionally configure your component to be 64-bit. A few factors come into play in making this decision. If you are using C++ for pure algorithmic speed, then I recommend building a 64-bit component, since 64-bit applications tend to run about 50% faster than 32-bit ones. In addition, your component will be able to access large amounts of memory, should that be needed. However, your 64-bit component will not be usable by someone with a 32-bit Windows operating system. If your component is a wrapper for another application, or if you are wrapping an existing third-party library, then you may need to match the bitness of your available database drivers, application drivers and libraries.
To configure to be 64-bit, select Build / Configuration Managerߪ. In the pulldown for Platform, select <Newߪ>. Set New platform=x64, copy settings from=Win32 and press OK. It should now look like this.
Creating the Object Class
Next, create the class that will get instantiated when you call COMCreateObject from Analytica. It is usually most convenient at this point to go to the Class View pane in Visual Studio.
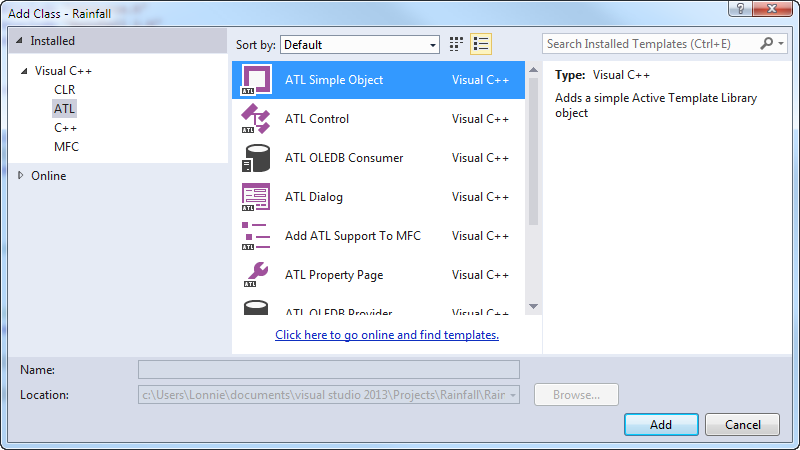
Select Project / Add Class… / ATL Simple Object and press Add.
Enter a short name for your class -- here I've named it Counter. Then fill in the ProgID. The ProgID will be the text you'll use when calling COMCreateObject from Analytica.
Note: If at some point in the future you change your mind about what the ProgID should be, after you've created the class and implemented something so that you don't want to start over with the Wizard, you can change it by editing IDR_«classname» in the "REGISTRY" folder in your project resources. For example, in this case it is IDR_COUNTER.
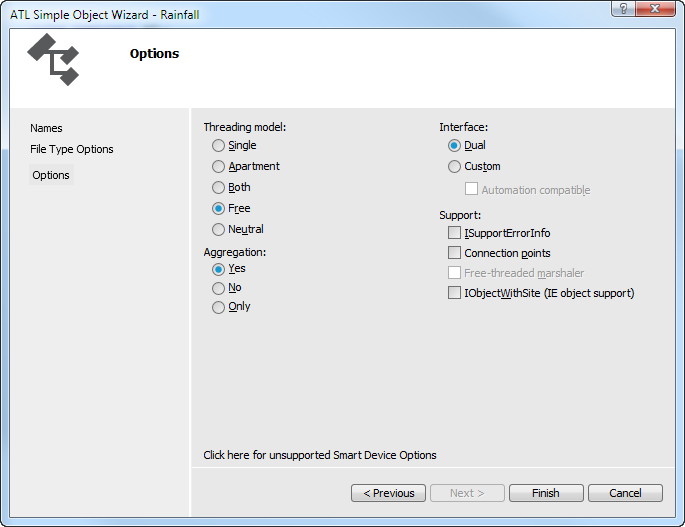
On the next screen, select the threading model. In most cases you will probably want to use Apartment, especially if you don't understand the differences between these. In my case, I'll be using the Free threading model, which is the most challenging to program for. I am using the free threading model so that I can call a method multiple times concurrently on separate data sets.
For use by Analytica, you must have Interface=Dual or Interface=Custom with automation compatible checked. Press Finish to finalize the creating of the object class.
Setting the printable name
Next, set the printed representation that you'll see in the Analytica interface when it displays an instance of your object. This step is optional, but if you don't do it, your object will simply be shown as «COM object».
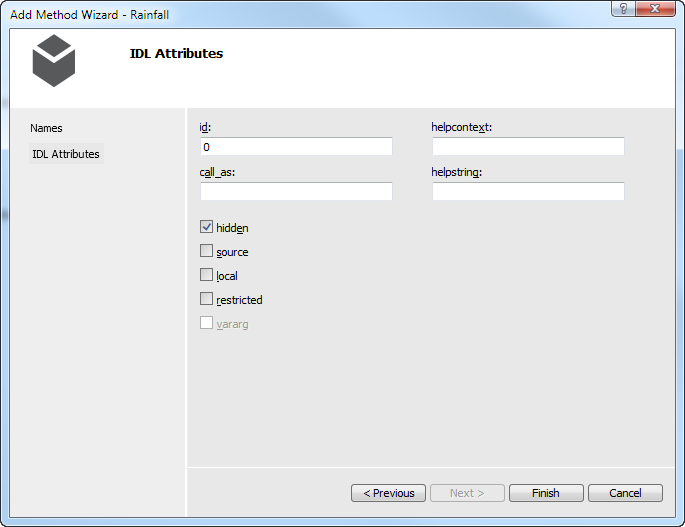
From the class view, right click on the interface class, ICounter in my case, and select Add / Add Method…. Create a method that returns an [out, retval] BSTR* result as shown here.
The method name can be anything, I have used ToText here, you may prefer ToString. Make sure you press the Add button before pressing Next>. Set the id to 0. Analytica looks for a method with id=0 to see if the object can print itself. You may optionally select hidden when people are using tools to browse the methods of your class. Press Finish.
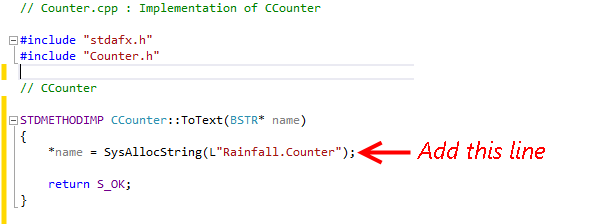
Now, edit the *.cpp file for your class, Counter.cpp in my case. You'll find the Add Method Wizard created an empty stub for your method, which you should now fill in to return the printed name of your object.
Register and test
Now that you have a class, you can run a test to verify that you can register (install) your component and instantiate it from Analytica.
Compile your project by selecting Build / Build solution. It should compile with no errors.
Next, to register (install) the component, open a CMD window and CD to your project directory, and then CD into the x64\Debug directory where your project was just built. Type YourProgram.exe /RegServerPerUser.
This inserts entries into your system registry telling Windows (and thus Analytica) how to instantiate your component. To uninstall, run it with /UnRegServerPerUser. The /RegServerPerUser installs the component for your user account only, and does not require system administration privileges. To install the component for all users on your computer, use /RegServer, but this only works if you run CMD and Administrator.
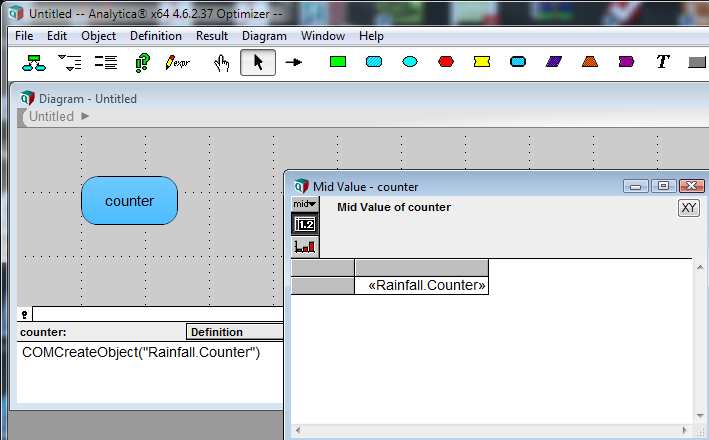
Finally, to test that you can create an instance, start Analytica and created a variable to hold the instance and define it as a call to COMCreateObject as seen here, replacing "Rainfall.Counter" with the ProgID of your own class.
Evaluate. If you see an instance appear as in the preceding screenshot, you have a working class and are ready to start implementing methods.
Before you can compile anew, you'll need to have Analytica release the object. To do this, insert a space into the definition with COMCreateObject to cause the computed result to invalidate.




Enable comment auto-refresher