Difference between revisions of "Creating the Populations objective"
| Line 1: | Line 1: | ||
| − | |||
1. Select both ‘Hares at end’ and ‘Foxes at end’ nodes to compare their result. Press the Result button. A question box will appear, click ‘ok’. | 1. Select both ‘Hares at end’ and ‘Foxes at end’ nodes to compare their result. Press the Result button. A question box will appear, click ‘ok’. | ||
[[Image:Question window.jpg]] | [[Image:Question window.jpg]] | ||
| − | 2. Result window should appear. Click on the | + | 2. Result window should appear. Click on the horizontal-axis pop up menu, select ‘time’. |
[[Image:Result Va2.jpg]] | [[Image:Result Va2.jpg]] | ||
Revision as of 08:51, 3 June 2010
1. Select both ‘Hares at end’ and ‘Foxes at end’ nodes to compare their result. Press the Result button. A question box will appear, click ‘ok’.
2. Result window should appear. Click on the horizontal-axis pop up menu, select ‘time’.
3. You should have a result like this.
4. Click on the diagram button.
5. Move the new node indicated by the arrow
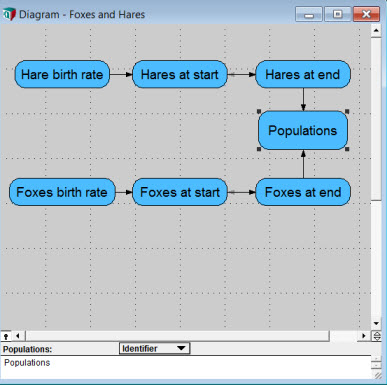
6. Click on the key icon to open the Attribute panel. Select ‘Identifier’ in the attribute popup menu. Type ‘Populations’, then press alt+enter.
7. Select ‘Class’ attribute from the Attribute popup menu.
8. From the Class popup menu select ‘Objective’. Variable node should be replaced by Objective node.
Comments


Enable comment auto-refresher